Introduction
Solar panels have become a popular choice for many homeowners and businesses looking to harness renewable energy. Installing solar panels on flat roofs presents unique challenges and opportunities compared to traditional sloped roofing. This guide will walk you through the process of solar panel installation on flat roofs, covering everything from planning and preparation to the installation techniques and maintenance required to ensure optimal performance.
Understanding Flat Roofs
Flat roofs, while not entirely flat, are designed with a slight slope to facilitate water drainage. Common materials used for flat roofing include bitumen, EPDM (ethylene propylene diene monomer), and TPO (thermoplastic polyolefin). The choice of roofing material will influence both the installation process and the mounting system needed for solar panels.
Planning and Assessment
Before installation begins, conducting a comprehensive site assessment is crucial. Key factors to consider include:
- Roof Condition: Ensure the roof is structurally sound and free of leaks or damage. Any necessary repairs should be addressed prior to installation.
- Weight Capacity: Determine the load capacity of the roof. Solar panels and their mounting systems add weight, so it’s essential to confirm that the structure can support this additional load.
- Shading: Evaluate potential sources of shade, such as nearby buildings or trees. Ideally, solar panels should receive direct sunlight for most of the day to maximize energy production.
- Orientation and Angle: While flat roofs have limited inclination, the panels can still be tilted using mounting systems to optimize their orientation toward the sun.
Designing the System
Based on the assessment, the next step is designing the solar panel system. This involves selecting the appropriate type and number of solar panels needed based on the energy requirements of the building. The design should also incorporate inverter systems, which convert the DC electricity produced by the panels into usable AC electricity.
Key Components:
- Solar Panels: Photovoltaic (PV) modules are generally selected based on efficiency and warranty.
- Inverters: String inverters, microinverters, or power optimizers will be chosen based on system design and installation preferences.
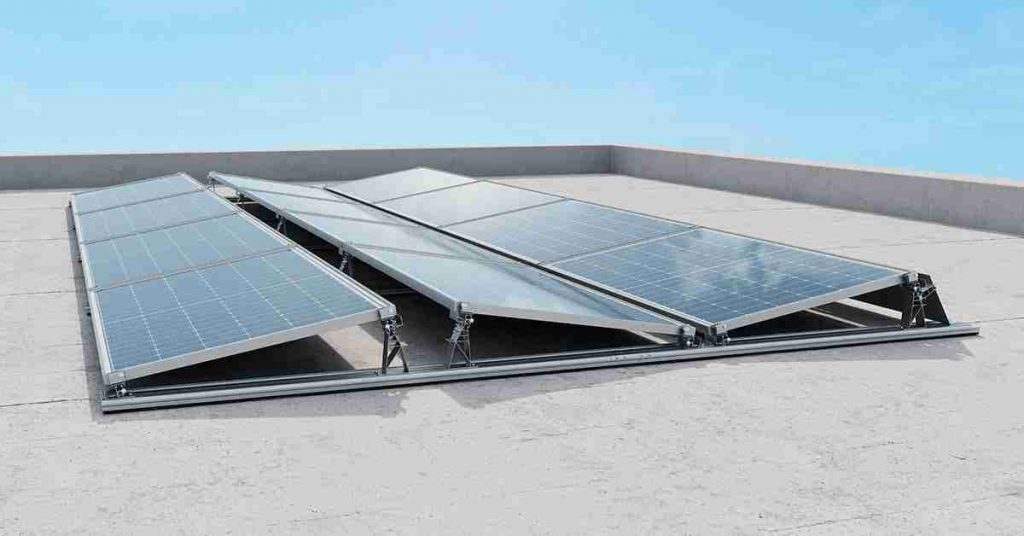
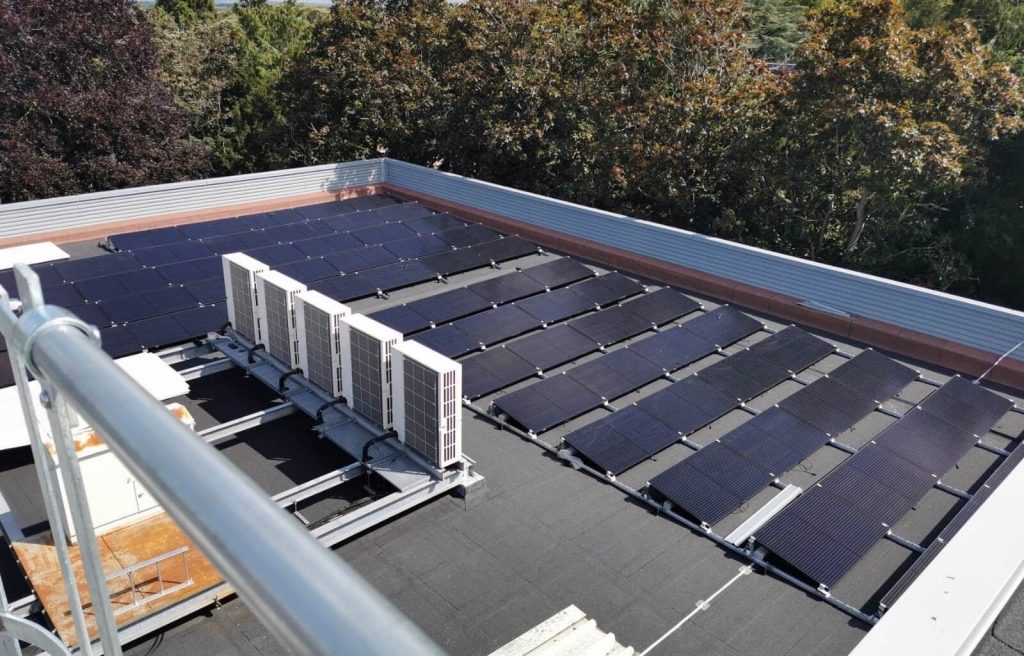
- Mounting Systems: For flat roofs, the most common systems are ballast-mounted or penetrating mounts.
Choosing the Right Mounting System
The mounting system is crucial for securely installing solar panels on flat roofs. There are two main types of systems:
- Ballast Systems: These rely on weights (ballast) to hold the solar panels in place without penetrating the roof membrane. This system is ideal for roofs that cannot be drilled into and is often used in residential and commercial installations. Ballast systems must be carefully designed to ensure the weight is evenly distributed and does not exceed the roof’s weight capacity.
- Penetrating Systems: These involve attaching the panels to the roof structure by drilling into the roof deck. This method provides a more secure installation, particularly in windy areas, but must be handled carefully to avoid compromising the roof’s waterproofing.
Installation Process
Step 1: Gathering Materials and Tools
Before commencing installation, gather the necessary materials and tools. This typically includes:
- Solar panels
- Mounting brackets and ballast
- Inverters
- Electrical wiring and connectors
- Sealants and flashing (if using penetrating mounts)
- Basic tools (drill, screwdriver, wrenches, level, etc.)
Step 2: Preparing the Roof
- Clean the Surface: Remove any debris, dirt, or obstructions from the roof surface to ensure a smooth installation.
- Mark Layout: Use a chalk line or marker to indicate where the solar panels and mounting systems will be installed. This layout helps in aligning panels and ensures a clean installation.
Step 3: Install the Mounting System
For Ballast Systems:
- Place the ballast blocks strategically according to the layout to ensure stability.
- Attach the mounting brackets onto the ballast according to the manufacturer’s guidelines.
For Penetrating Systems:
- Mark the locations for the mounting brackets and carefully drill holes as needed.
- Apply sealant to each hole to prevent water ingress, then secure the mounting brackets with screws.
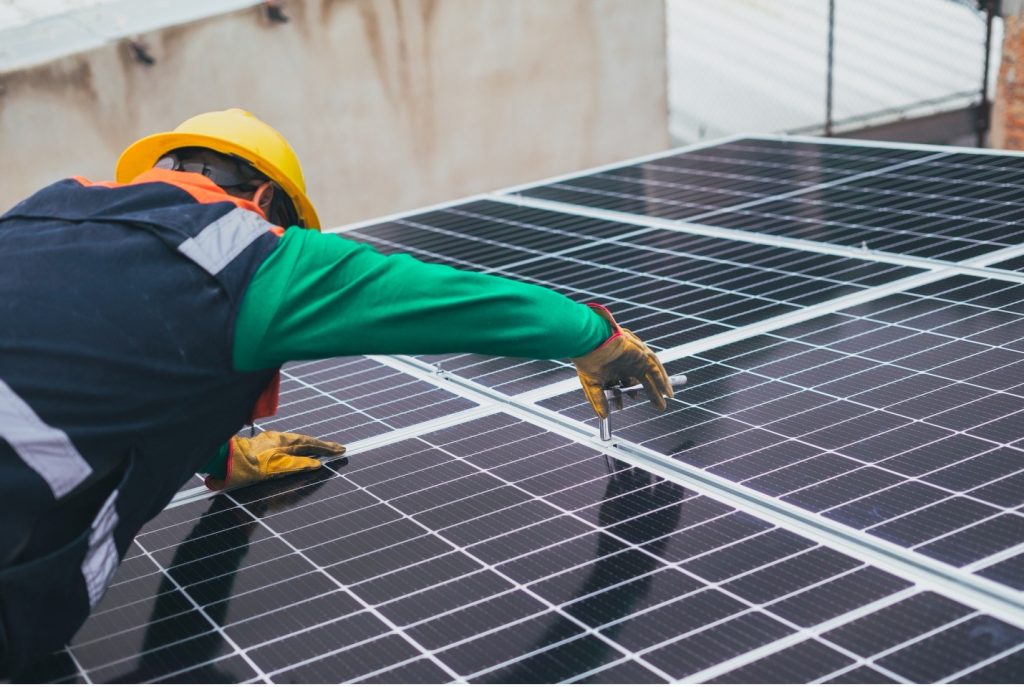
Step 4: Installing Solar Panels
Once the mounting brackets are in place, it’s time to install the solar panels:
- Attach the solar panels to the brackets following the specified guidelines.
- Connect the panels in series or parallel, depending on the design, ensuring secure electrical connections.
- Connect the solar panels to the inverter using appropriate wiring.
Step 5: Electrical Work
The final step in the installation process involves connecting the solar panel system to the electrical system of the building:
- Secure the inverter in a designated location (usually near the solar panels).
- Connect the inverter to the electrical panel, ensuring adherence to local electrical codes and standards.
- If necessary, coordinate with a licensed electrician to complete the electrical connections.
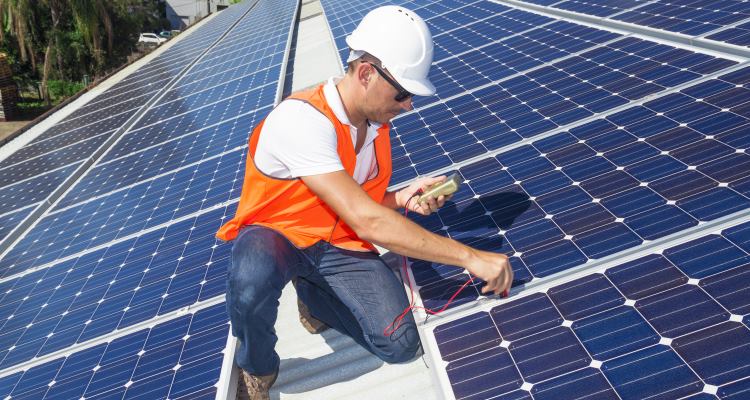
Testing and Commissioning
Once the installation is complete, conduct thorough testing to ensure everything functions correctly:
- Check for proper electrical connections.
- Test the inverter to confirm it’s generating electricity as expected.
- Monitor the solar panel performance over the first few days to ensure optimal energy production.
Maintenance of Solar Panels on Flat Roofs
Regular maintenance is essential to ensure the longevity and efficiency of the solar energy system. Here are some key maintenance tips:
- Clean the Panels: Dust, debris, and bird droppings can accumulate on solar panels, impacting their efficiency. Regular cleaning may be necessary, especially in dusty environments.
- Inspect the Mounting System: Periodically check the mounting brackets and ballast to ensure everything is secure and in good condition.
- Monitor Performance: Use an energy monitoring system to track the performance and output of the solar panels to identify any potential issues early.
- Check for Roof Damage: Regularly inspect the roof surface and surrounding area for any signs of damage or leaks that could affect the solar installation.
Conclusion
Installing solar panels on flat roofs is a practical way to utilize roof space while promoting sustainable energy use. By following a careful assessment, choosing the appropriate mounting system, and adhering to a thorough installation process, homeowners and businesses can successfully implement a solar power solution that meets their energy needs. With the right maintenance, these systems can provide clean, renewable energy for many years, benefiting both the environment and the wallet.